Aurora Patina
  • Home
  • Behind the Patina
  • Contact Me
  • Linky Parties
  • For Sale

Aurora Patina

Where furniture of days gone by gets new life and DIY is the name of the game.
Welcome!

Questions?

Front Porch Upgrade

3/7/2015

14 Comments

 
Picture
Picture
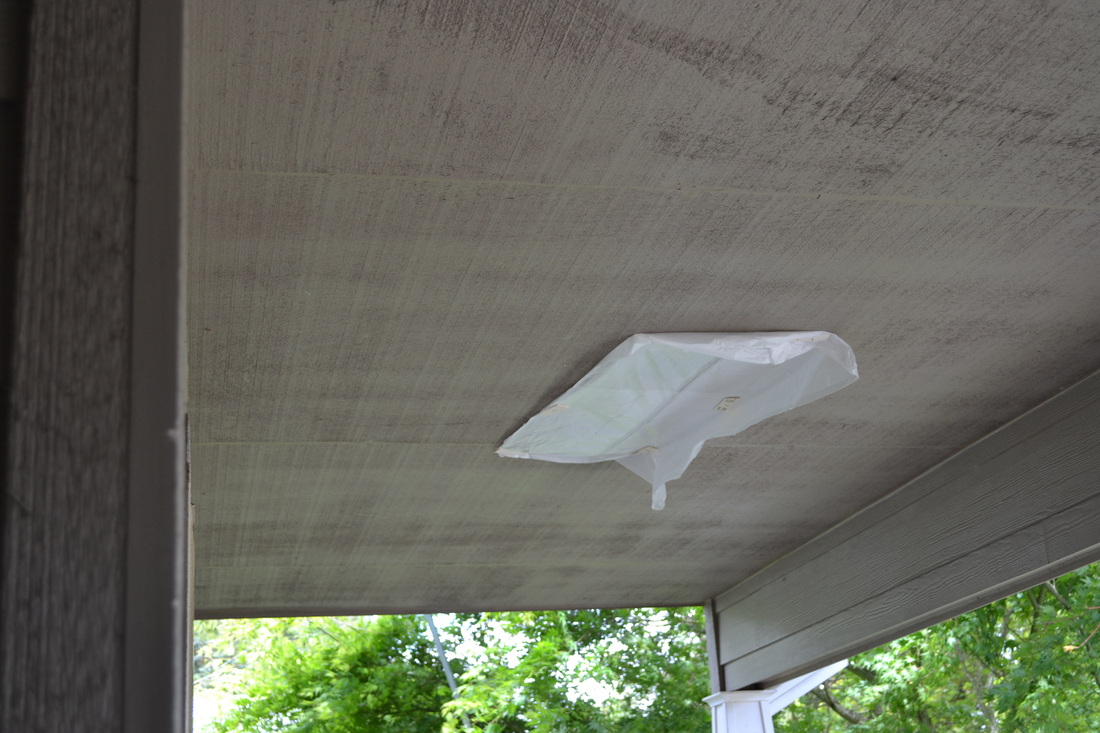
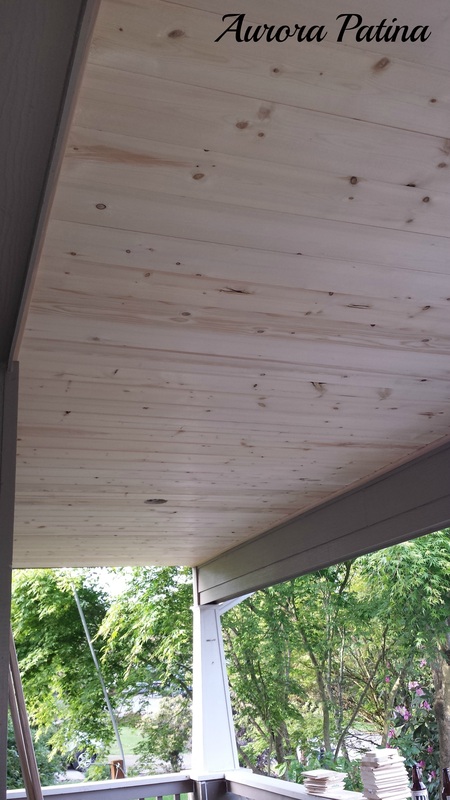
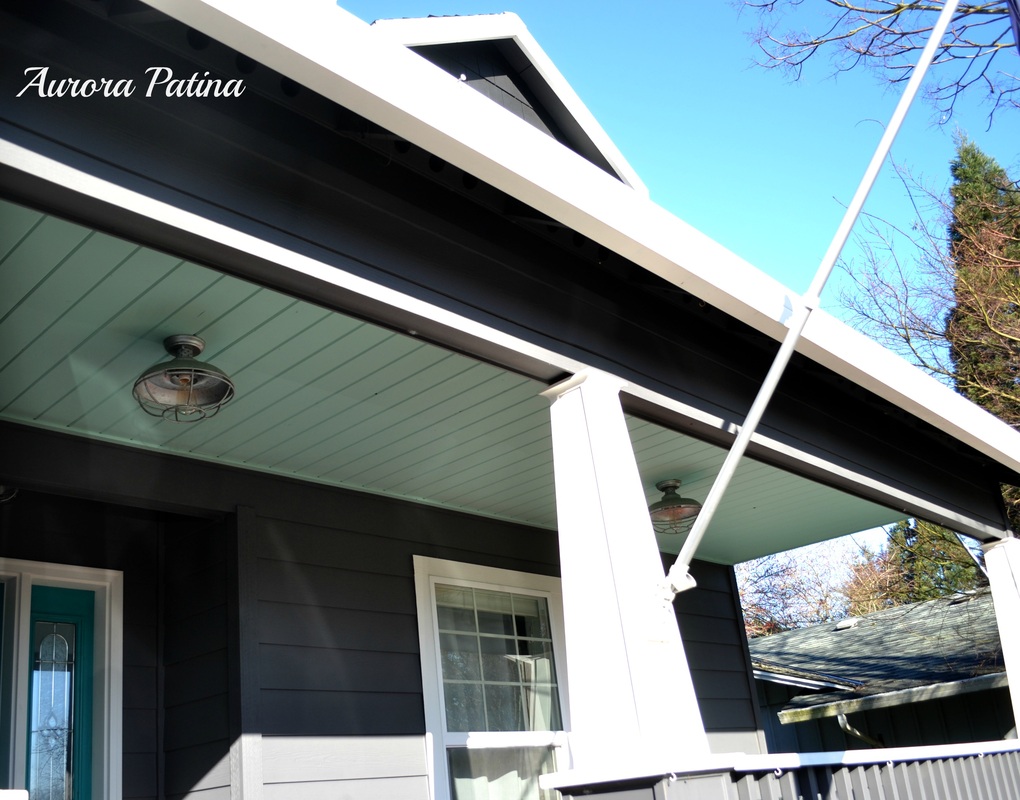
Hi Friends! I hope you have had a great week! I have been sick as a dog, but am on the mend, so all is good! Today I have been going through my backlog of project pics and have decided to post about a fairly quick and easy project Hubs and I did last Spring.  The area we updated had not even crossed my mind until I stumbled on to a home blog about a new build. One of the pics showed some workers putting tongue and groove up on the porch ceiling. So, of course, my next step was to walk out on to my porch and take a look. I did not like what I saw! Not even a little. Mind you, we've been here for nearly 10 years and I've looked at the porch ceiling many times, but I guess I didn't really "see" just how builder grade blah it was. 
Picture
Picture
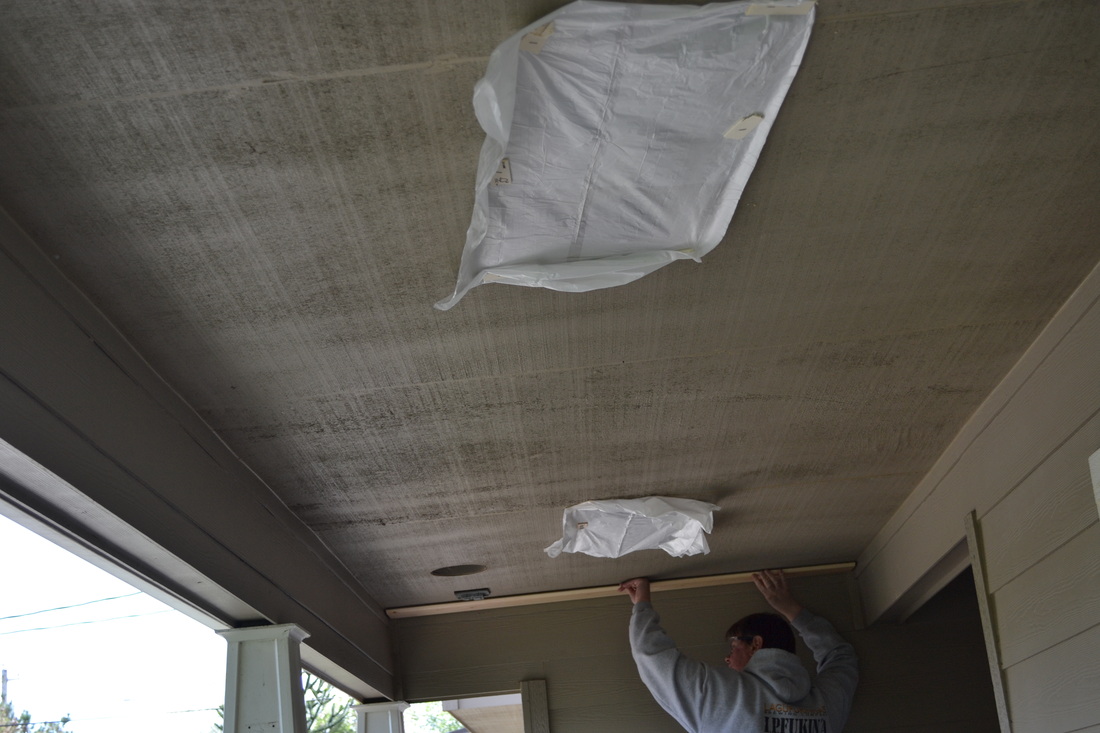
We did not have plastic on the ceiling. This was an area where we added additional lighting. We cut a hole in the ceiling and didn't want any critters going in there before we covered it back up.

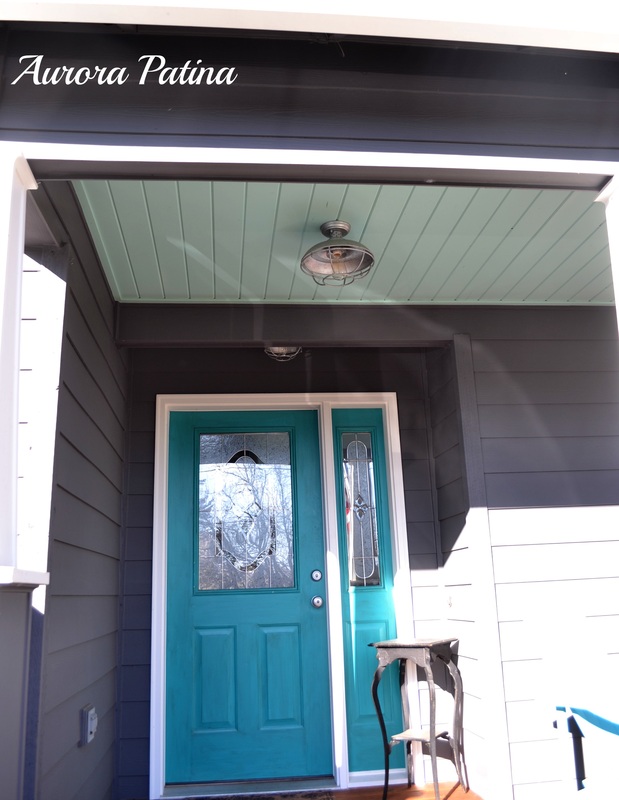
It did not take long to get Hubs on board with correcting this issue! First we whipped out the measuring tape, then went to Home Depot to pick out the boards.   We had a lack of lighting, so we decided to add a fixture further down the porch.  Since the original light was not centered, we moved its position and centered it up with the additional light.  Then came the fun part - power tools!
Picture
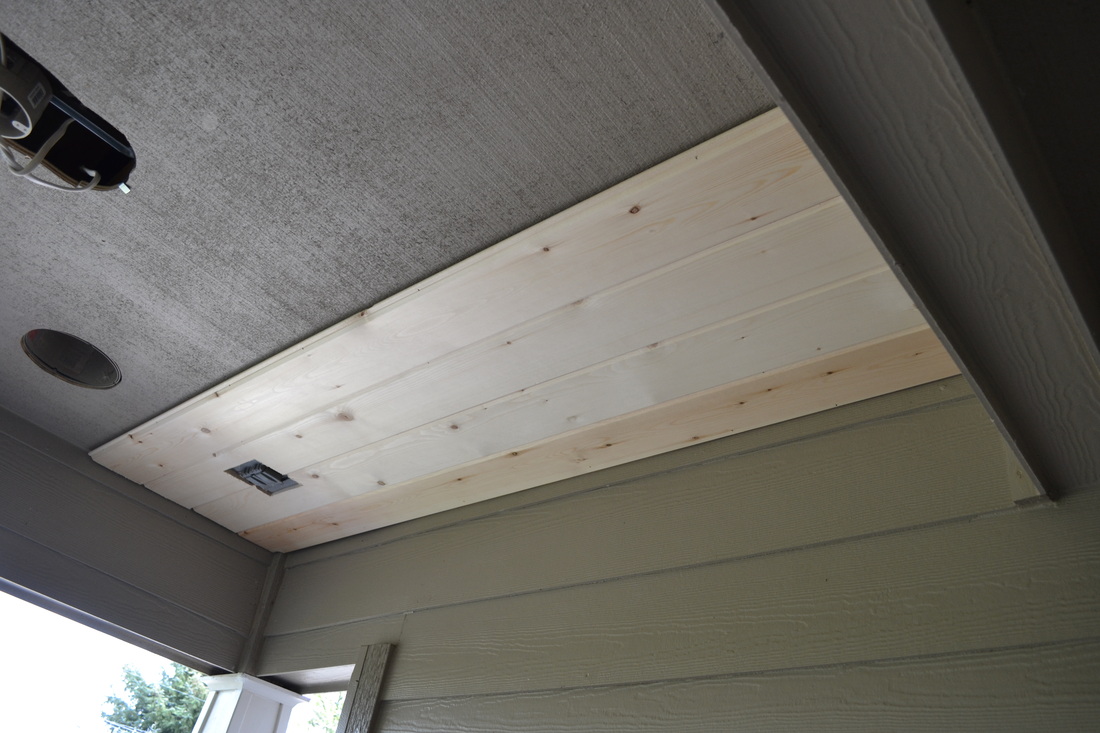
If you haven't worked with tongue and groove before, I think you'll be in for a nice surprise. It is super easy! First, measure the length of the board and cut to size. The most important part is to make sure you position the very first board correctly. Since the boards seat in to each other, if your first board is crooked, they will all be crooked.  Once it's in position, you just work your way down the row to the end. You'll need to measure and jigsaw cut around the outlets, which isn't too hard, but is probably the most difficult part of this job. You just want to make sure to follow the old rule of "measure twice, cut once".  A rule that Hubs and I seem to have to relearn on every project we do! 
Picture
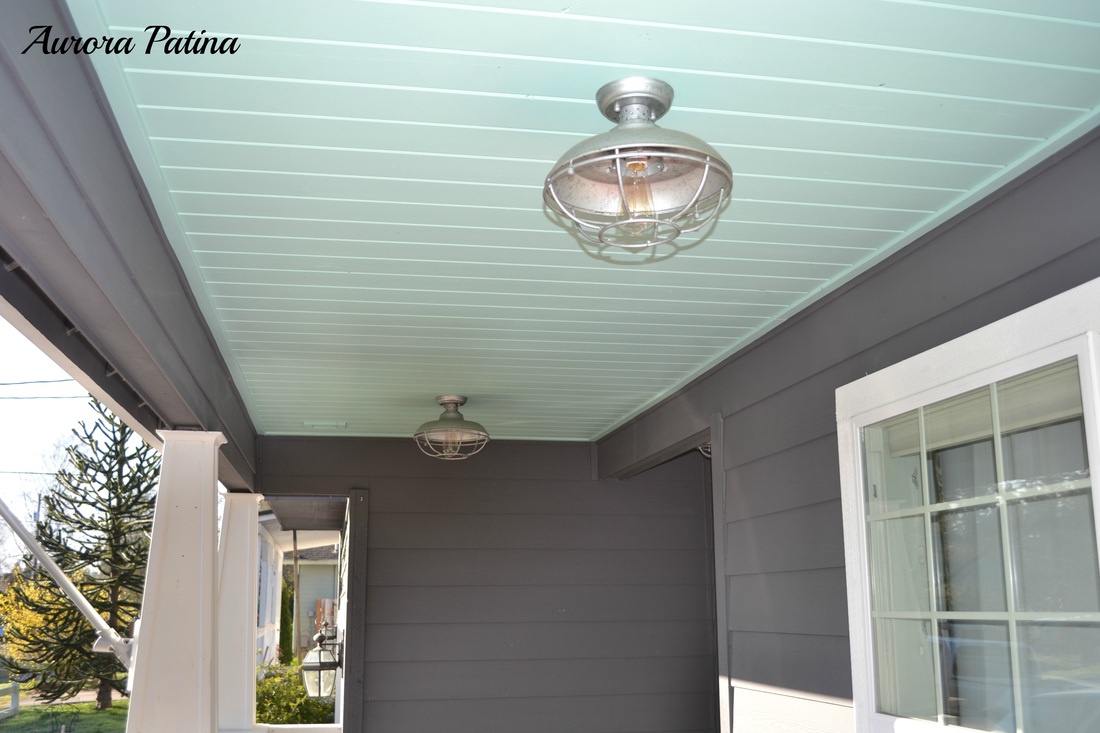
We added straight flat trim pieces along the edges where the boards met the siding. At this point, we were ready to add some new light fixtures. I decided rather than thrifting for this, I was going to look in to new fixtures that had a vintage feel to them.  I really wanted to wrap this project up because we were having the house painted.  I got online and found fixtures that I loved at Lamps Plus. 
Picture
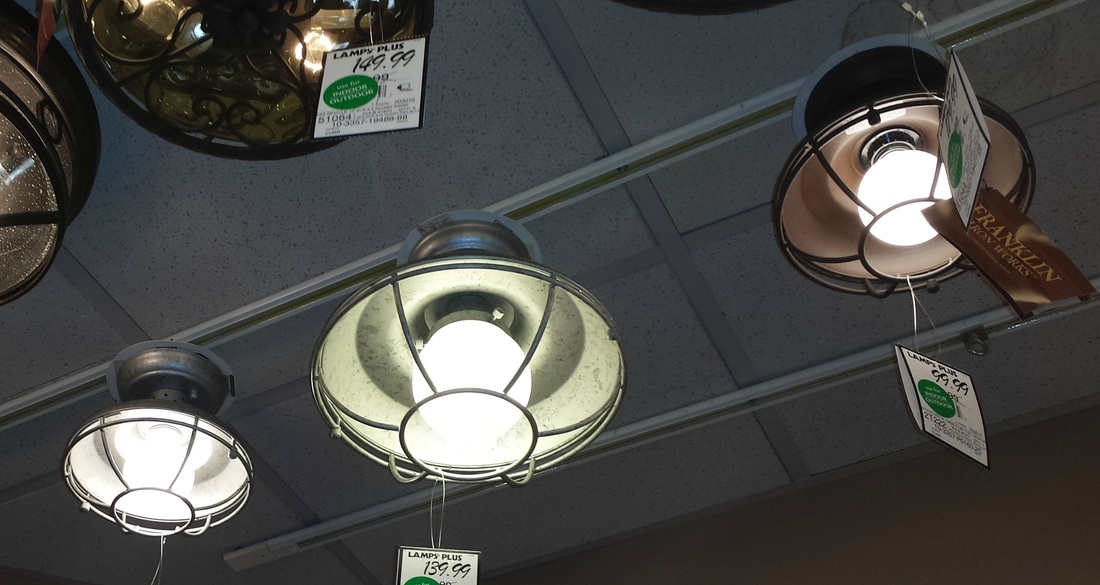
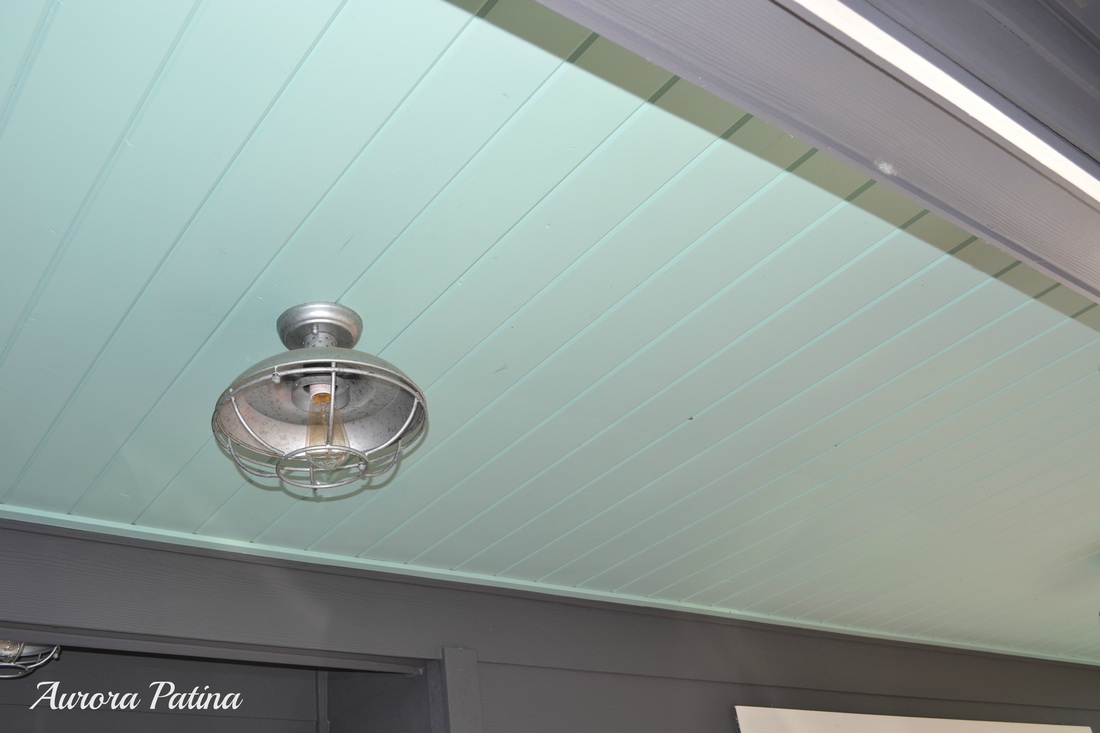
LOVE the galvanized look of these lights!!
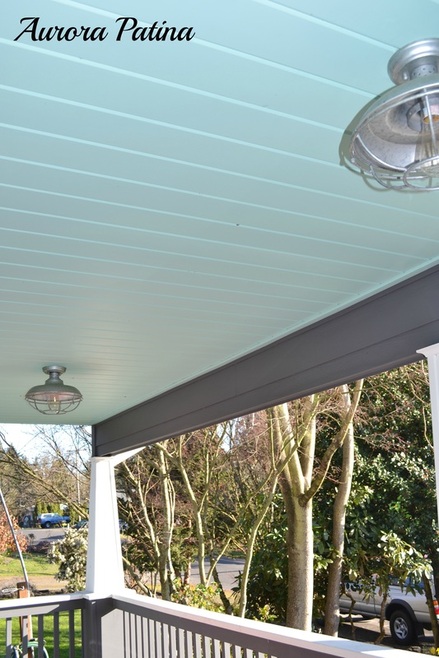
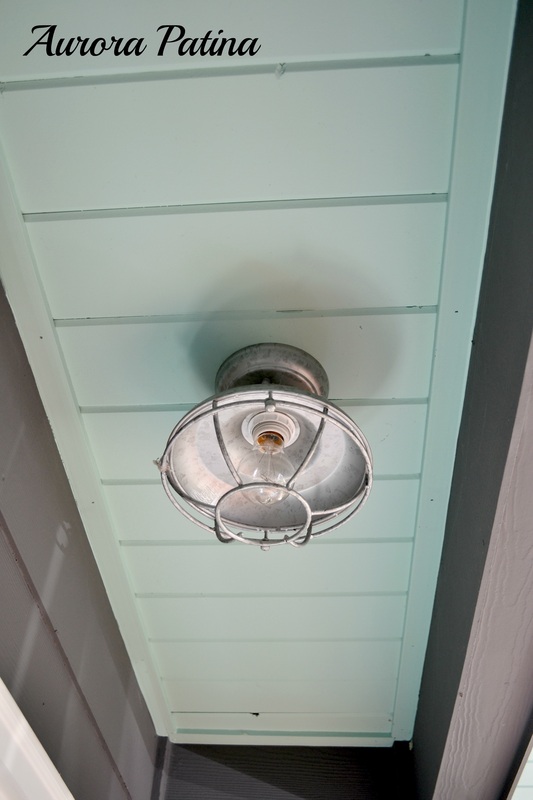
My next decision was whether I should stain or paint the ceiling. It wasn't a hard choice for me, I knew I wanted to paint it a soft aqua blue color. My house painter looked at me like I was nuts, he clearly thought it should be stained. That's ok, though, it's my house, not his! Plus, I LOVE how it turned out!
Picture
The Edison bulbs give the warmest, homey glow at night. Plus, they are the coolest looking bulbs around, in my opinion!
Picture
Picture
Picture
Picture
Picture
Picture

Linking Up at These Great Parties

14 Comments
CD Loken link
3/10/2015 11:47:20 pm

Oh my goodness,Kris! What a lovely update for your porch!! I LOVE the color you chose for the ceiling-and the front door....GORGEOUS!!! Thank you so much for sharing at The Wonderful Wednesday Blog Hop!

Reply
Kris Harney
3/12/2015 06:18:52 am

Thank you CD!

Reply
Mila link
3/12/2015 07:50:20 pm

You did a fine job! And I like colors you painted your porch with - very soothing.
Hope you're feeling much better now!

I would love for you to share your porch upgrade with our Thursday Link Up Party- Idea box:

http://milaslittlethings.com/2015/03/idea-box-thursday-link-party.html

xx
Mila
milaslittlethings.com
milawayable@gmail.com

Reply
Kris link
3/14/2015 01:53:37 am

Thank you for stopping by, Mila! I linked up on your party and added you to my weekly party list - thanks for hosting!

Reply
Pamela-FromMyFrontPorchToYours link
3/13/2015 04:08:47 pm

Kris it turned out greta and love the blue. I have been wanting to do this to our porch ceilings as well. I just may have to tackle it this year. Thank you for joining us at THT!

Reply
Kris link
3/14/2015 01:57:10 am

Thank you, Pamela! I appreciate you stopping by to check out my porch! You should definitely do this project, it was a really easy upgrade and I love how it turned out!

Reply
Creatively Homespun link
3/15/2015 03:02:31 am

This turned out great!!! Thanks for sharing at the Link Party- Palooza! I'll be pinning for sure!

Reply
Kris link
3/16/2015 09:46:34 am

Thanks for hosting and stopping by to take a look!

Reply
C. Lem (creativeclementine.com) link
3/15/2015 10:54:24 am

What a gorgeous update! I love the colours and the galvanized light fixture. I should look up more often! :)
So happy to have you with us at Idea Box link party. Can't wait to see what good ideas you bring next week!

Reply
Kris link
3/16/2015 09:54:49 am

Thank you for hosting and stopping by to take a look!

Reply
Kammy's Korner link
3/16/2015 11:11:53 am

Featuring your stunning porch upgrade at tonight's Trash 2 Treasure party! :)

Reply
Kris Harney
3/16/2015 11:34:54 am

That is awesome! Thanks so much!!

Reply
TwoPlusCute link
4/4/2015 01:17:59 am

I found you as featured on the Scrapality party. You definitely deserved it!
You guys did a great job with your porch.

Reply
Filipino Indiana link
3/24/2021 12:32:05 am

Hi nicee reading your post

Reply


Leave a Reply.

    Author

    Hi Friends! My name is Kris. I'm a mom and wife who loves to DIY around the house and  fix up old things to make them beautiful again!

    Picture
    Kris @ Aurora Patina

    RSS Feed

    Archives

    August 2015
    July 2015
    June 2015
    May 2015
    April 2015
    March 2015
    December 2013
    October 2013
    August 2013
    July 2013
    June 2013
    May 2013
    April 2013
    March 2013

    Categories

    All
    Cottage
    Crafting
    DIY
    Furniture
    Garden
    Painting
    Remodel
    Shabby Chic
    Shop
    Texas
    Thrifting
    Tutorials

    Enter your email address:

    Delivered by FeedBurner

    I've been Featured:

    Picture
    Picture
    Picture
    Boogieboard Cottage
    Scrapality.com
    Picture
    Picture
    Picture
    Picture
    Picture
    Picture
    Picture
Proudly powered by Weebly
Photo used under Creative Commons from sierragoddess