Aurora Patina
  • Home
  • Behind the Patina
  • Contact Me
  • Linky Parties
  • For Sale

Aurora Patina

Where furniture of days gone by gets new life and DIY is the name of the game.
Welcome!

Questions?

Powder Room Revamp

3/22/2015

14 Comments

 
Picture
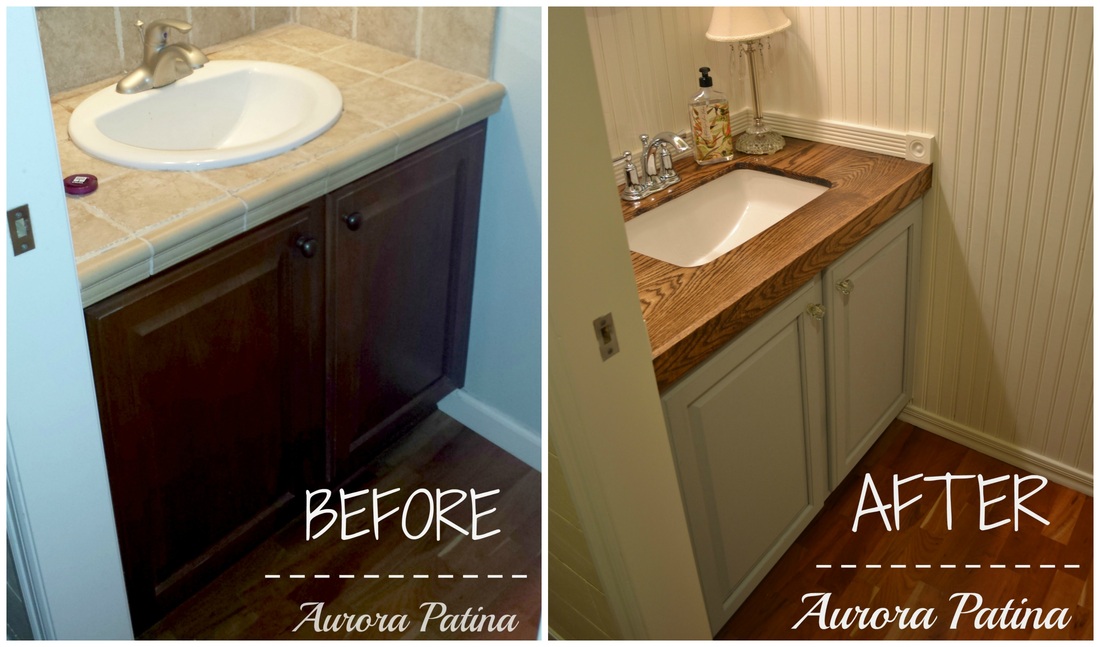
Hi Friends! This week I'm back with our recent powder room "remodel". This is a project that I have been thinking about for more than a year. I finally started figuring out what I really wanted to do in there and decided a plank wood counter-top would be really cool. I also knew I wanted to do wainscoting.  This is going to be kind of a lengthy post, so if you are just here to see the pictures, scroll on down!

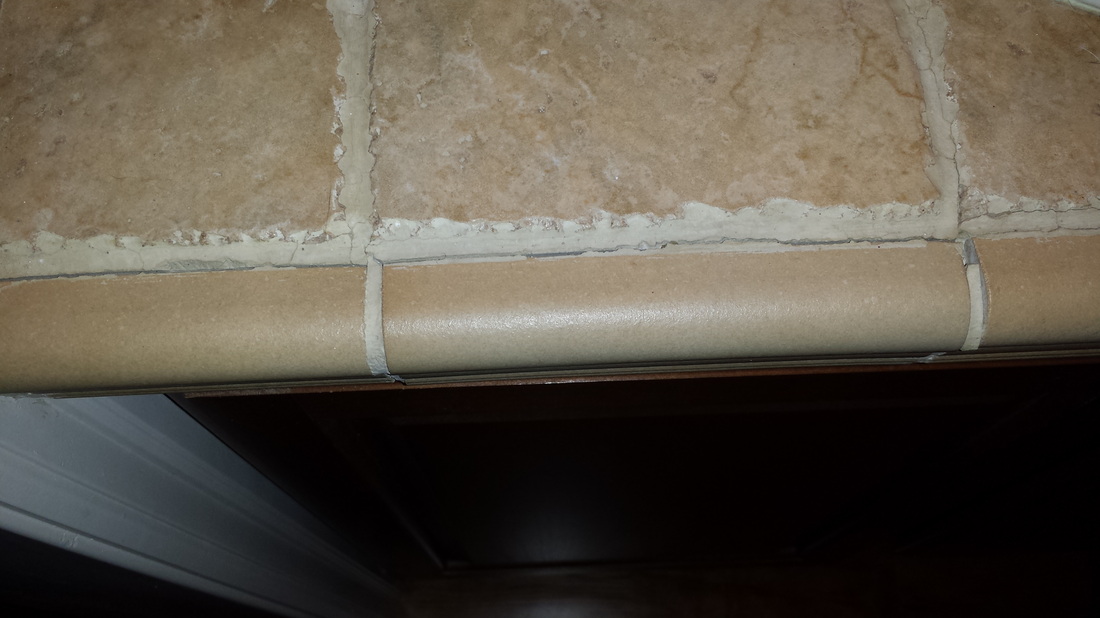
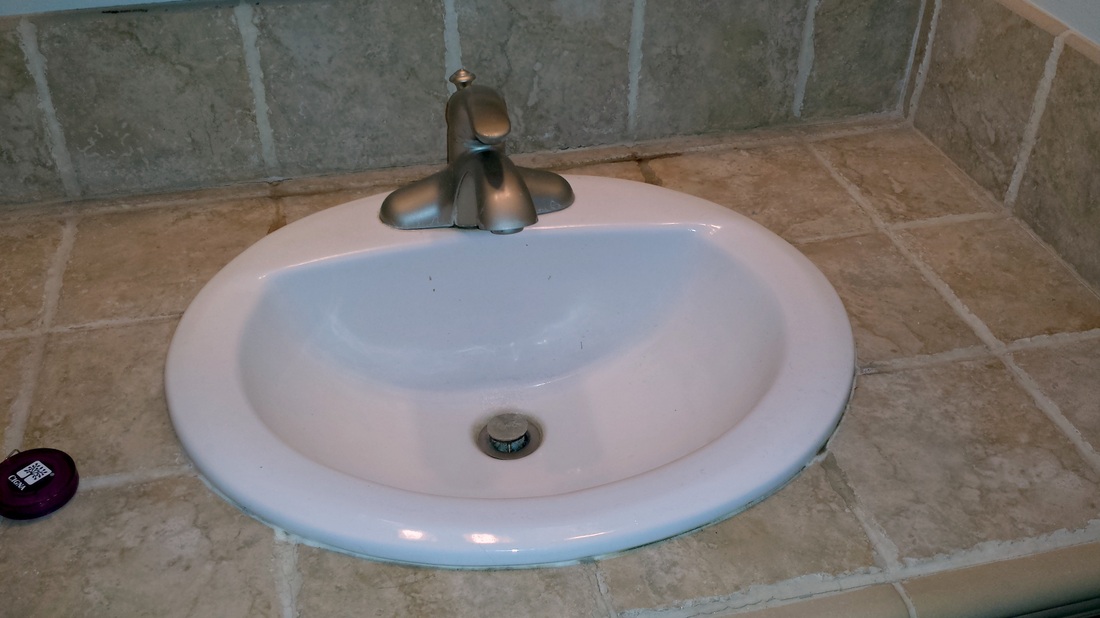
One problem we inherited with our house is the poor tile work. The grout is falling apart and the tiles are actually falling off the counters. The water would always pool up behind the sink and I really didn't like the sink or the faucet.
Picture
Picture
The first step was getting the tiles off the counter. I barely touched the ones on the front and the entire row of bull-nose tiles fell right off.  Since that was a piece of cake, I figured the others would pop right off without a lot of work. I was wrong. Really, really wrong. They were there for the long run.  Oh well, that's what hammers and chisels are made for!

Read More
14 Comments

Pretty Plank Wall

3/14/2015

11 Comments

 
Picture
I'm still digging in to my backlog of projects to post on. This week it's the plank wall we completed last Summer.  I don't know if you've seen the show Fixer Upper, but it seems like a ton of the older houses in that show have shiplap.  I REALLY love that look! Our house was built in 2004, so alas, no shiplap for me. Not to worry, I can fix that!

First I started doing research about what kind of product I should use. I knew it needed to be very thin. I found just what I was looking for at our local Lowes. It came in 8 foot sheets and at the time, I didn't have much in the way of saws, so a little bit of "woe is me" went a long way. The nice kid at the store took pity on me and ripped the sheets in to 6" strips for me! 
We put the first strip up on the wall and followed a pretty simple pattern. We just moved the second board, one foot to the left, then the third board was set one foot further to the left, kind of like stairs. You can see it in the picture above. In a few hours we had the entire wall done.  

It's worth noting that you can use something flat, like a paint stick, to keep your spacing between boards even.  I have to admit, though, I used my eyeballs! Also, If you don't already have a nail gun, it is definitely worth your money for a project like this. Either that or borrow one from your friendly neighbor!
Picture
Picture

Read More
11 Comments

Front Porch Upgrade

3/7/2015

14 Comments

 
Picture
Picture
Hi Friends! I hope you have had a great week! I have been sick as a dog, but am on the mend, so all is good! Today I have been going through my backlog of project pics and have decided to post about a fairly quick and easy project Hubs and I did last Spring.  The area we updated had not even crossed my mind until I stumbled on to a home blog about a new build. One of the pics showed some workers putting tongue and groove up on the porch ceiling. So, of course, my next step was to walk out on to my porch and take a look. I did not like what I saw! Not even a little. Mind you, we've been here for nearly 10 years and I've looked at the porch ceiling many times, but I guess I didn't really "see" just how builder grade blah it was. 
Picture

Read More
14 Comments

    Author

    Hi Friends! My name is Kris. I'm a mom and wife who loves to DIY around the house and  fix up old things to make them beautiful again!

    Picture
    Kris @ Aurora Patina

    RSS Feed

    Archives

    August 2015
    July 2015
    June 2015
    May 2015
    April 2015
    March 2015
    December 2013
    October 2013
    August 2013
    July 2013
    June 2013
    May 2013
    April 2013
    March 2013

    Categories

    All
    Cottage
    Crafting
    DIY
    Furniture
    Garden
    Painting
    Remodel
    Shabby Chic
    Shop
    Texas
    Thrifting
    Tutorials

    Enter your email address:

    Delivered by FeedBurner

    I've been Featured:

    Picture
    Picture
    Picture
    Boogieboard Cottage
    Scrapality.com
    Picture
    Picture
    Picture
    Picture
    Picture
    Picture
    Picture
Proudly powered by Weebly
Photo from sierragoddess