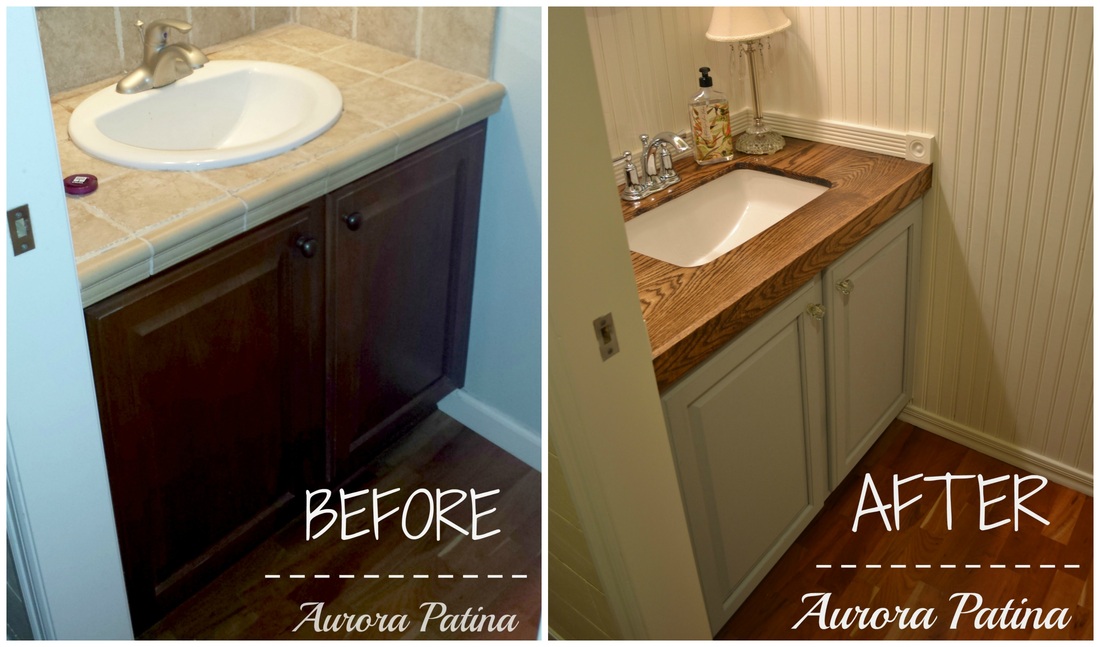

Hi Friends! This week I'm back with our recent powder room "remodel". This is a project that I have been thinking about for more than a year. I finally started figuring out what I really wanted to do in there and decided a plank wood counter-top would be really cool. I also knew I wanted to do wainscoting. This is going to be kind of a lengthy post, so if you are just here to see the pictures, scroll on down!
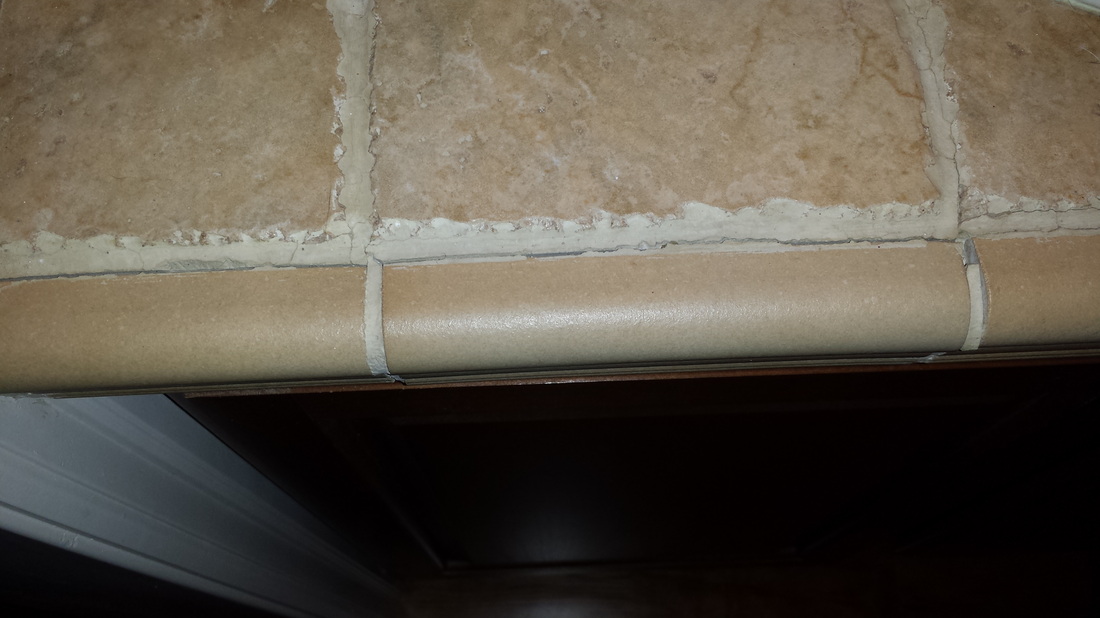
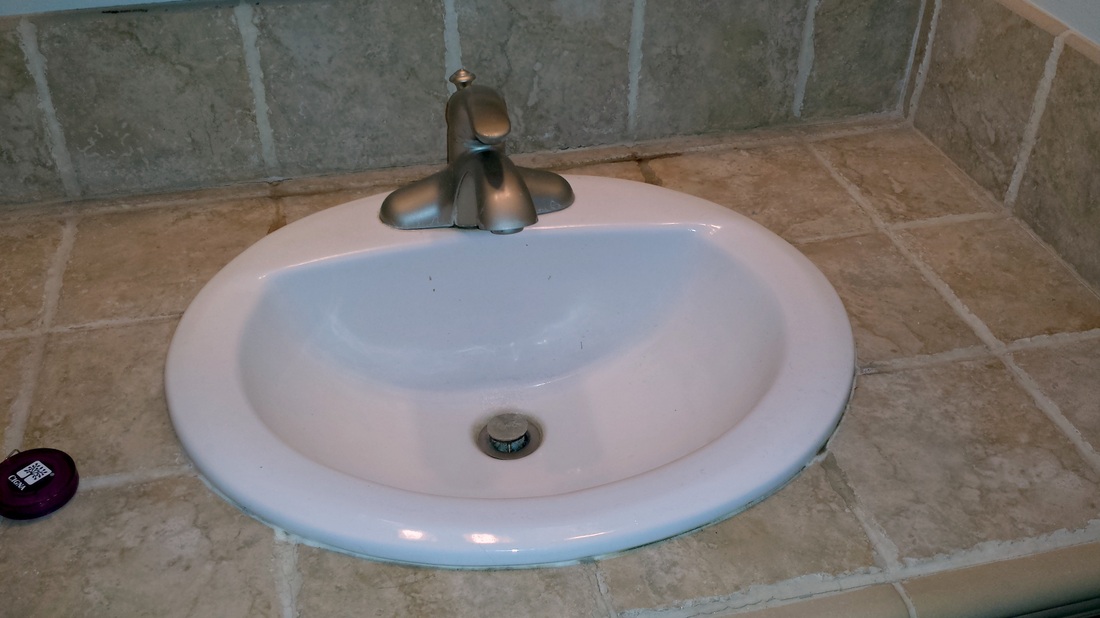
One problem we inherited with our house is the poor tile work. The grout is falling apart and the tiles are actually falling off the counters. The water would always pool up behind the sink and I really didn't like the sink or the faucet.
One problem we inherited with our house is the poor tile work. The grout is falling apart and the tiles are actually falling off the counters. The water would always pool up behind the sink and I really didn't like the sink or the faucet.
|
|
The first step was getting the tiles off the counter. I barely touched the ones on the front and the entire row of bull-nose tiles fell right off. Since that was a piece of cake, I figured the others would pop right off without a lot of work. I was wrong. Really, really wrong. They were there for the long run. Oh well, that's what hammers and chisels are made for!
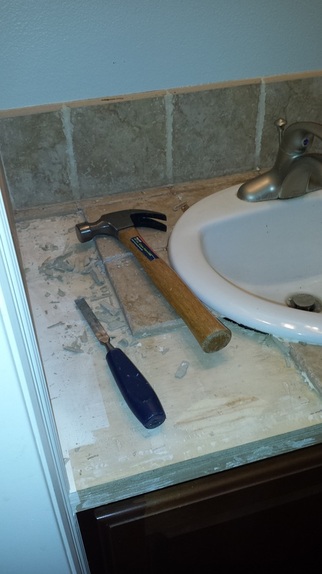
I basically ended up smashing the tiles to bits.
|
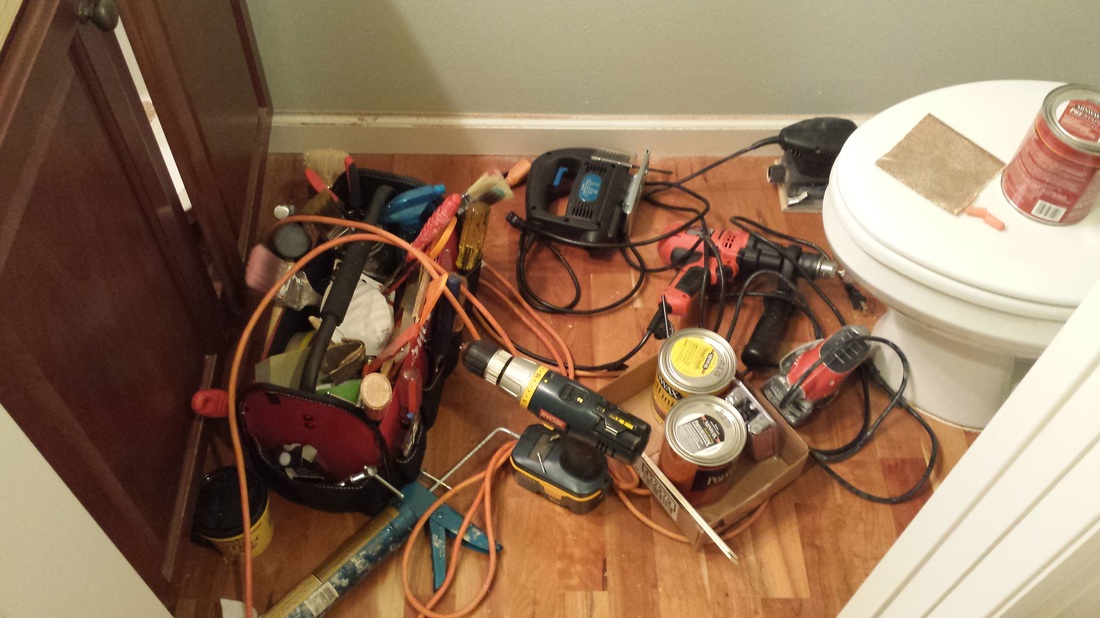
It's clear to see we used a LOT of different tools for this job!
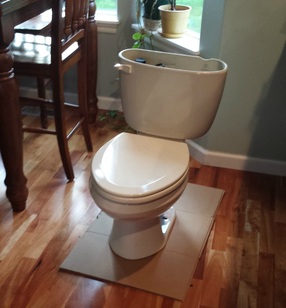
Nothing like having a toilet in your breakfast nook!
|
Once I removed all of the tile, I requested Hubs help to get the sink and toilet out. I'm fine tearing stuff up and painting, etc., but plumbing is not something I know how to do. Not yet, anyway. Once the sink came out, I was down to just the plywood surface.
|
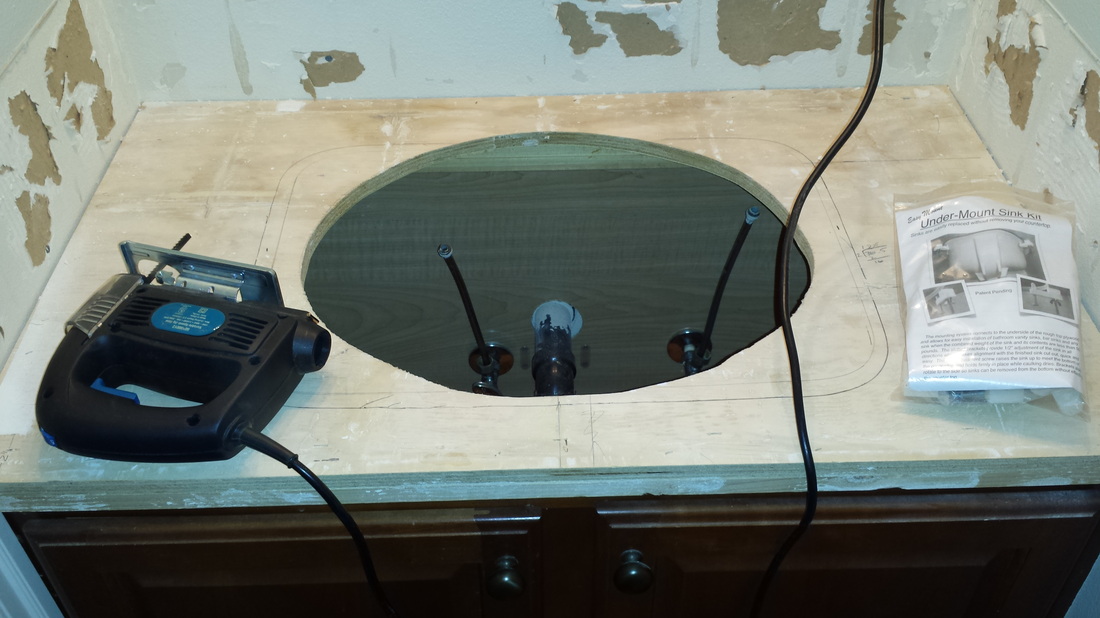
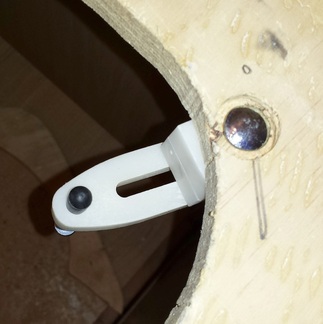
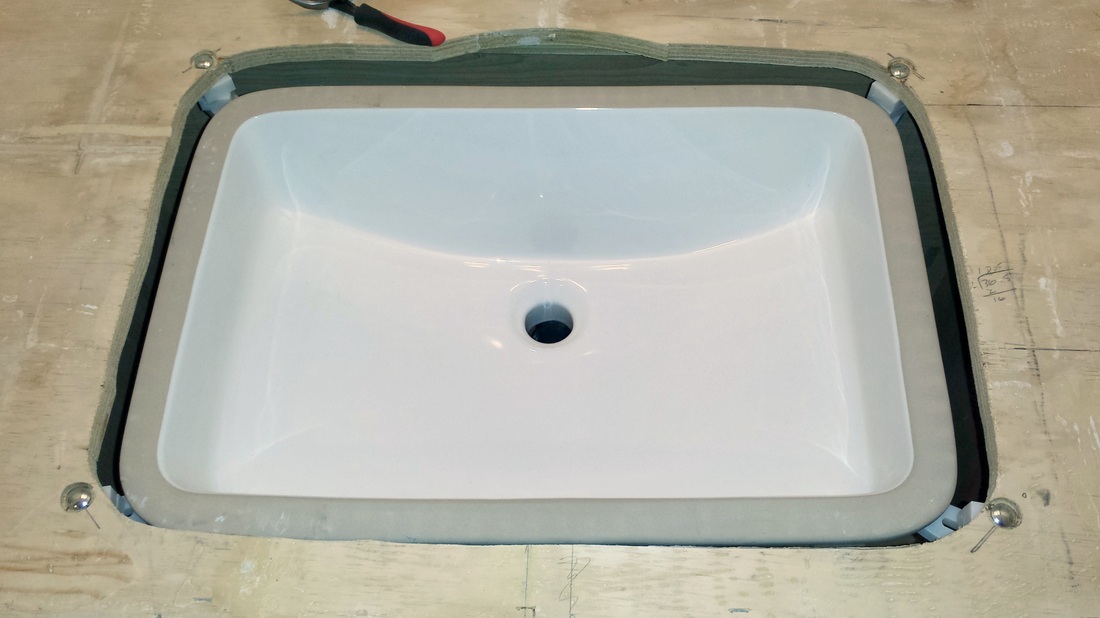
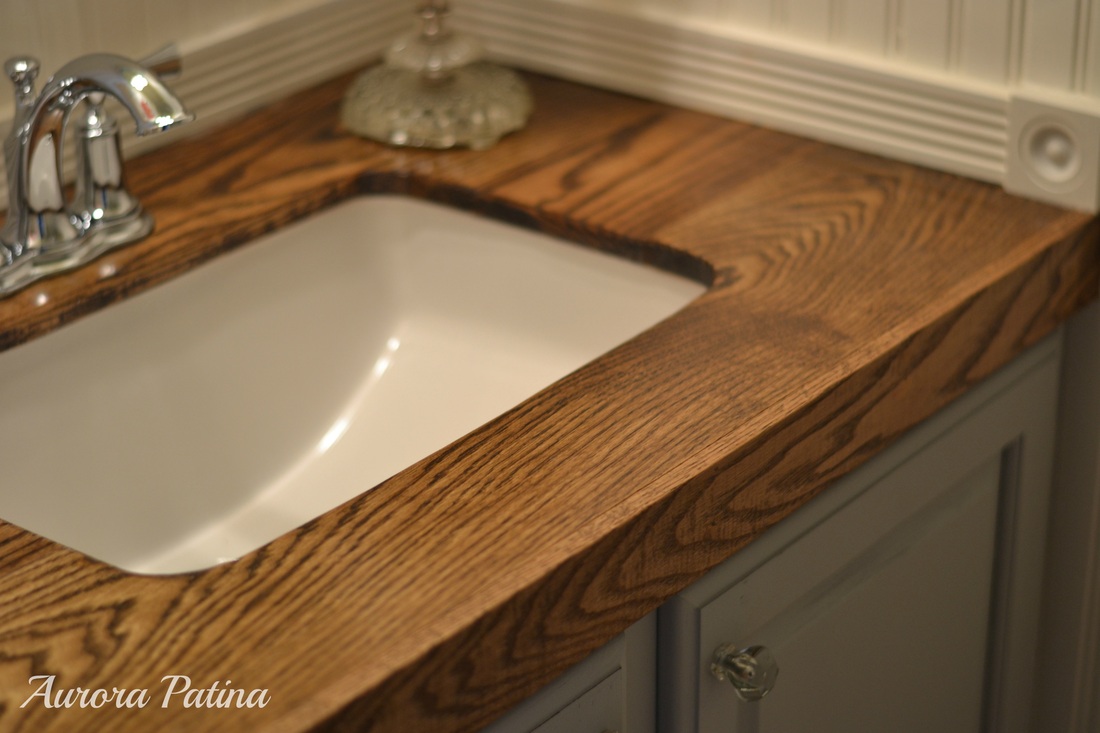
I decided to do an under mount sink, so I flipped the sink upside down and drew the outline on the plywood base. Then I took my jigsaw and cut that out. I was pretty nervous about mounting the sink to the counter. So, like any good diyer, I watched a lot of YouTube videos! I happened to find this company that makes a kit for attaching under-mount sinks to the counter. You can find their product and video tutorial at www.sinkmountkit.com. You don't have to do this, you can use the kit that comes with the sink itself. I do believe this kit made the job much easier, though and would recommend it. This is solely my opinion, I have not received payment for advertising this company, I just used their product and liked it.
|
After the sink hole was cut in the plywood section, it was time to start building the plank counter-top. I did a lot of searching on how to best complete this task and found a really great tutorial on the blog
Simply Maggie. She was really brave and did her entire kitchen this way. I am awe-inspired by her. That is quite a big undertaking and her counters turned out absolutely gorgeous. You should definitely go check her work out!
Simply Maggie. She was really brave and did her entire kitchen this way. I am awe-inspired by her. That is quite a big undertaking and her counters turned out absolutely gorgeous. You should definitely go check her work out!
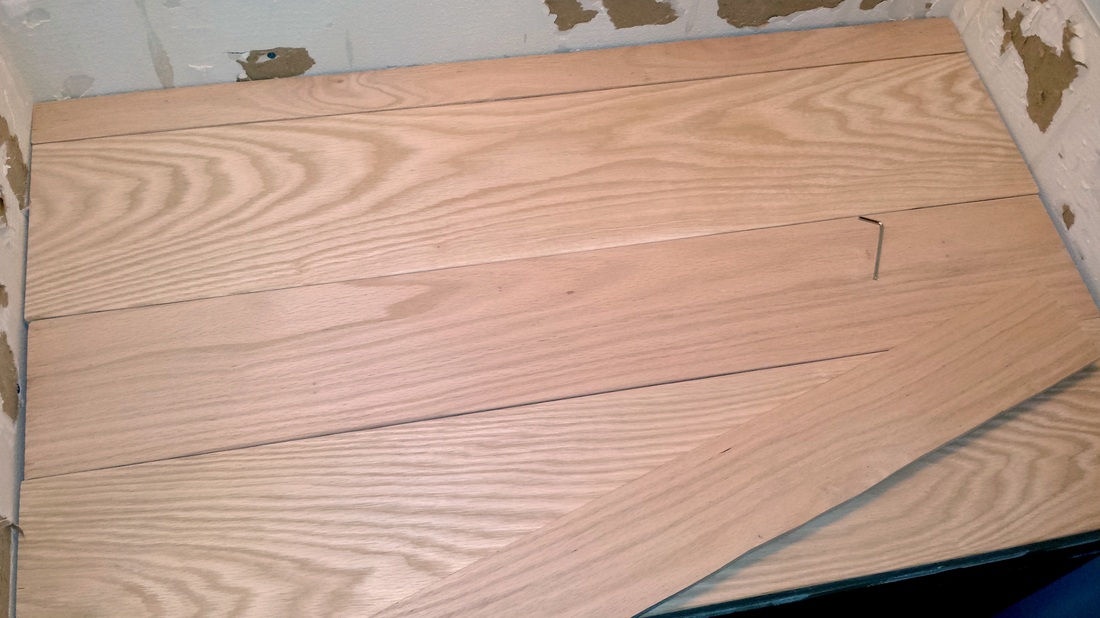
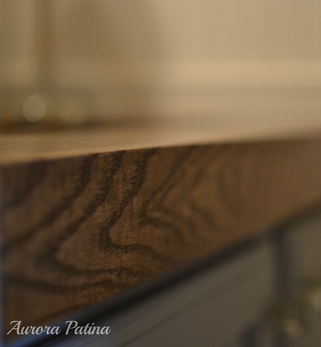
We used red oak for the planks. Measured and cut to fit the space.
|
This was my first cut - these boards are not cheap, so I was really nervous about cutting them!
|

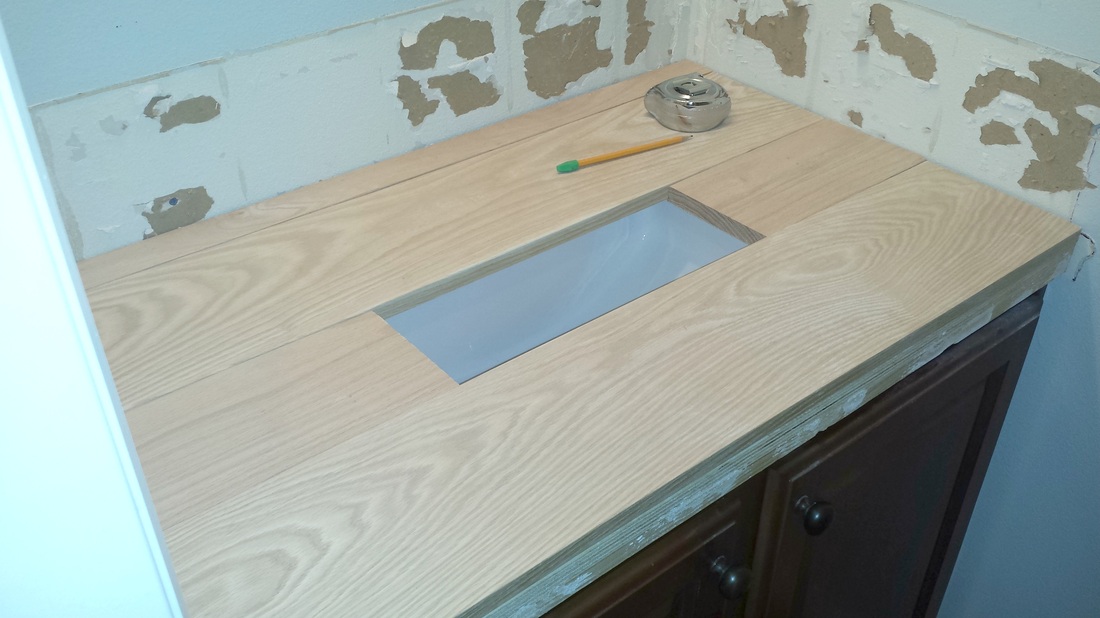
Uuuummmm.... I'm pretty sure that is NOT what the hole is supposed to look like! Haha! Red Oak is a very hard wood and our rinky dink jigsaw had a really hard time cutting through it. Getting this hole right, took hours of shaving, sanding, shaving some more and sanding.
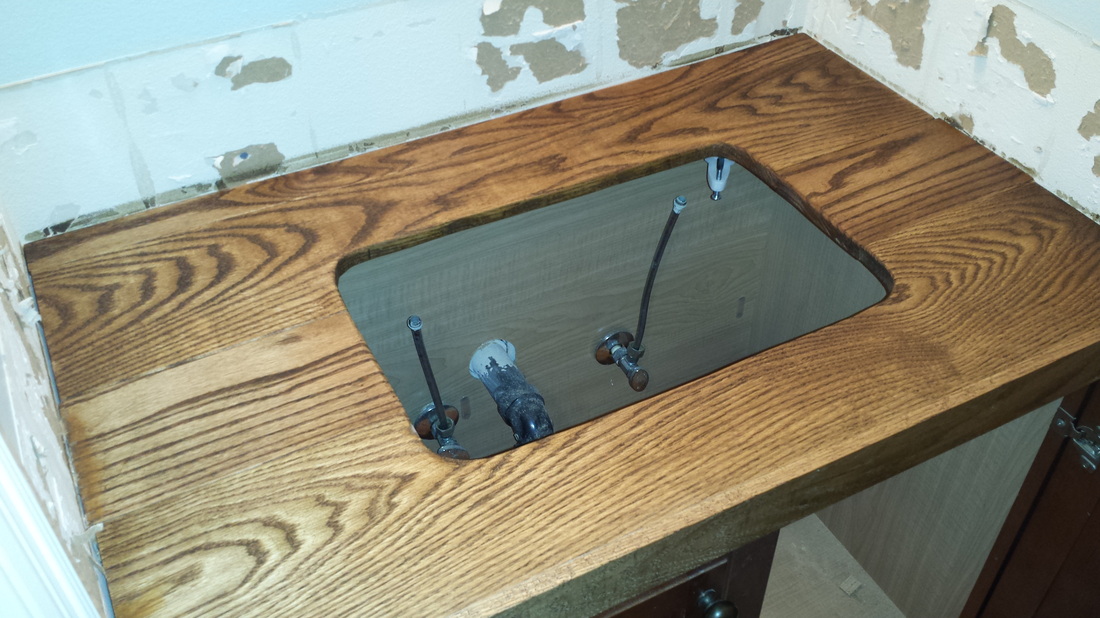
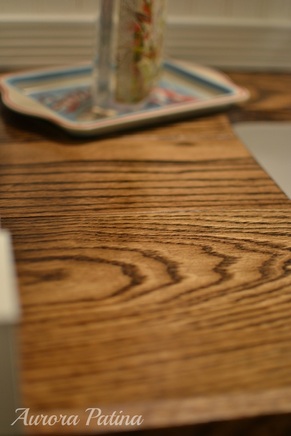
I used a Dark Walnut stain and the grain turned out amazing! After staining, I did 4 coats of polyurethane to make sure it would be well protected from water.
|
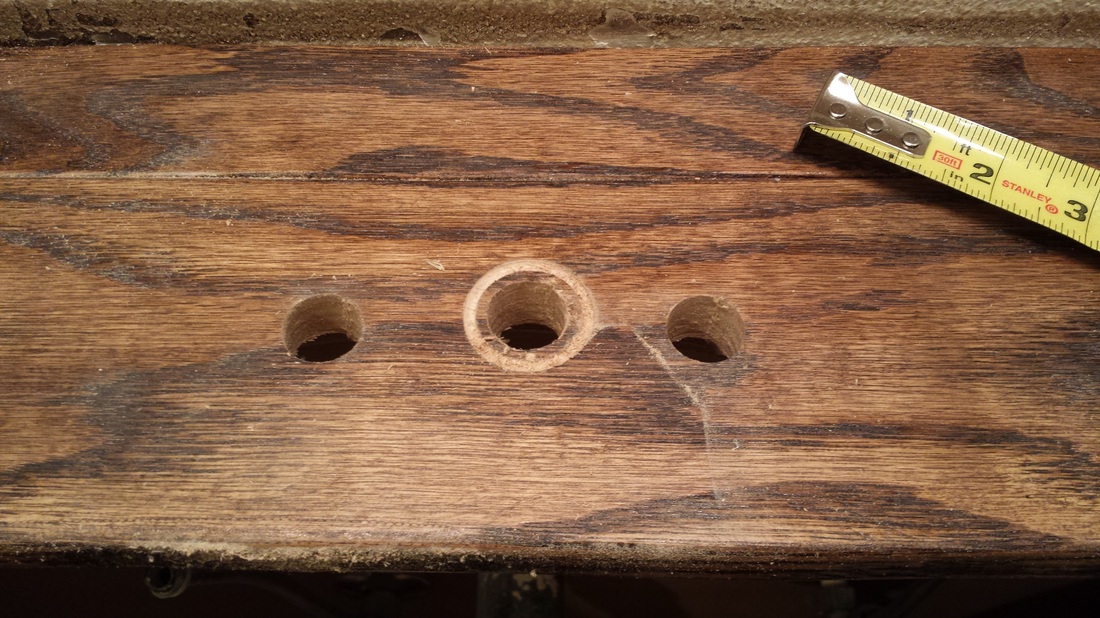
These are the holes I drilled for the faucet placement.
|
|

|
Next up: Wainscoting
Hubs and I went to Home Depot and Lowes. At first I thought we would go with the MDF panelling, but every sheet we looked at was damaged, so we decided to do individual boards. It was actually pretty easy.
Hubs and I went to Home Depot and Lowes. At first I thought we would go with the MDF panelling, but every sheet we looked at was damaged, so we decided to do individual boards. It was actually pretty easy.

I contemplated staining it rather than painting it, but only for 1 second. I didn't want it to look like a log cabin.
|

He is such an amazing hubby! He smiles when I say, "Honey, I have a new project!"
|
Getting shots of the room was not easy because it's pretty small. Only 3 feet by about 7. I managed to get a few though. This project isn't quite finished yet. I am planning on putting wallpaper up and building some floating shelves over the toilet. Once I am done with that, I will post a few more pics.
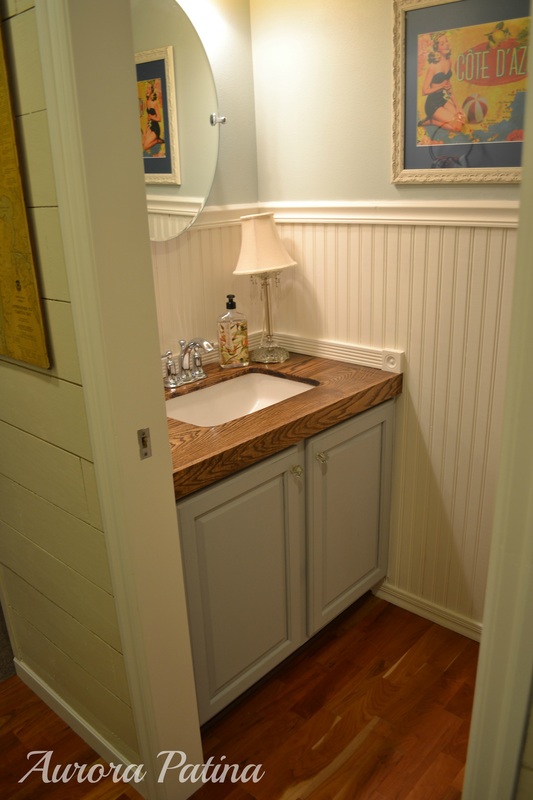
The paint on the wall is too light now that we put up the wainscot. Next up: Wallpaper!
|
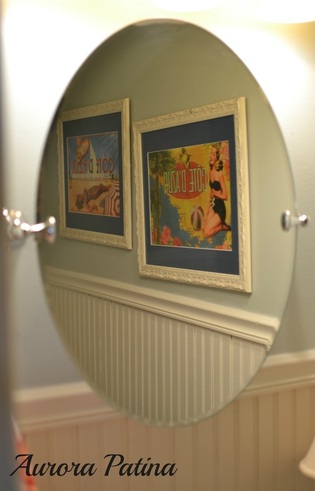
I found a mirror similar to this at Pottery Barn, but it was close to $300! I found this one on Wayfair for around $50. It's a perfect fit!
|


I picked a couple of plastic placemats up in Provence this summer. I took them down to Craft Warehouse to have them framed.
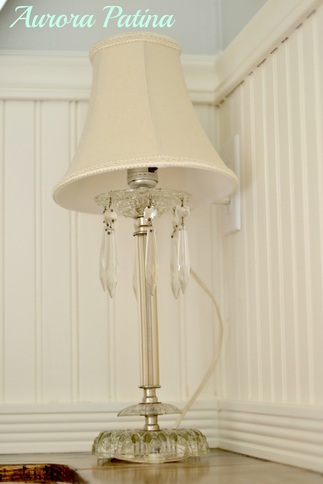
This little lamp is one of my most prized possessions. It was my Great Auntie B's bedside lamp. She was one of my favorite people on the planet and I really miss her, but this lamp always makes me think of her with a smile!
|

I love leaving the main light off and turning this one on. It gives the little powder room a nice, homey glow.
|
Thank you for stopping by and taking a look at our little powder room makeover. I hope to see you again next week!


 RSS Feed